

Over thirty percent of American households with pets express concerns about chemical safety during pest treatments, especially when young children are present. For Ohio homeowners, protecting pets and the environment often feels just as important as removing unwanted pests. With step-by-step planning and clear safety guidelines, you can keep your family and animals safe while achieving reliable pest control, eliminating the guesswork from a process that can seem overwhelming at first.
Table of Contents
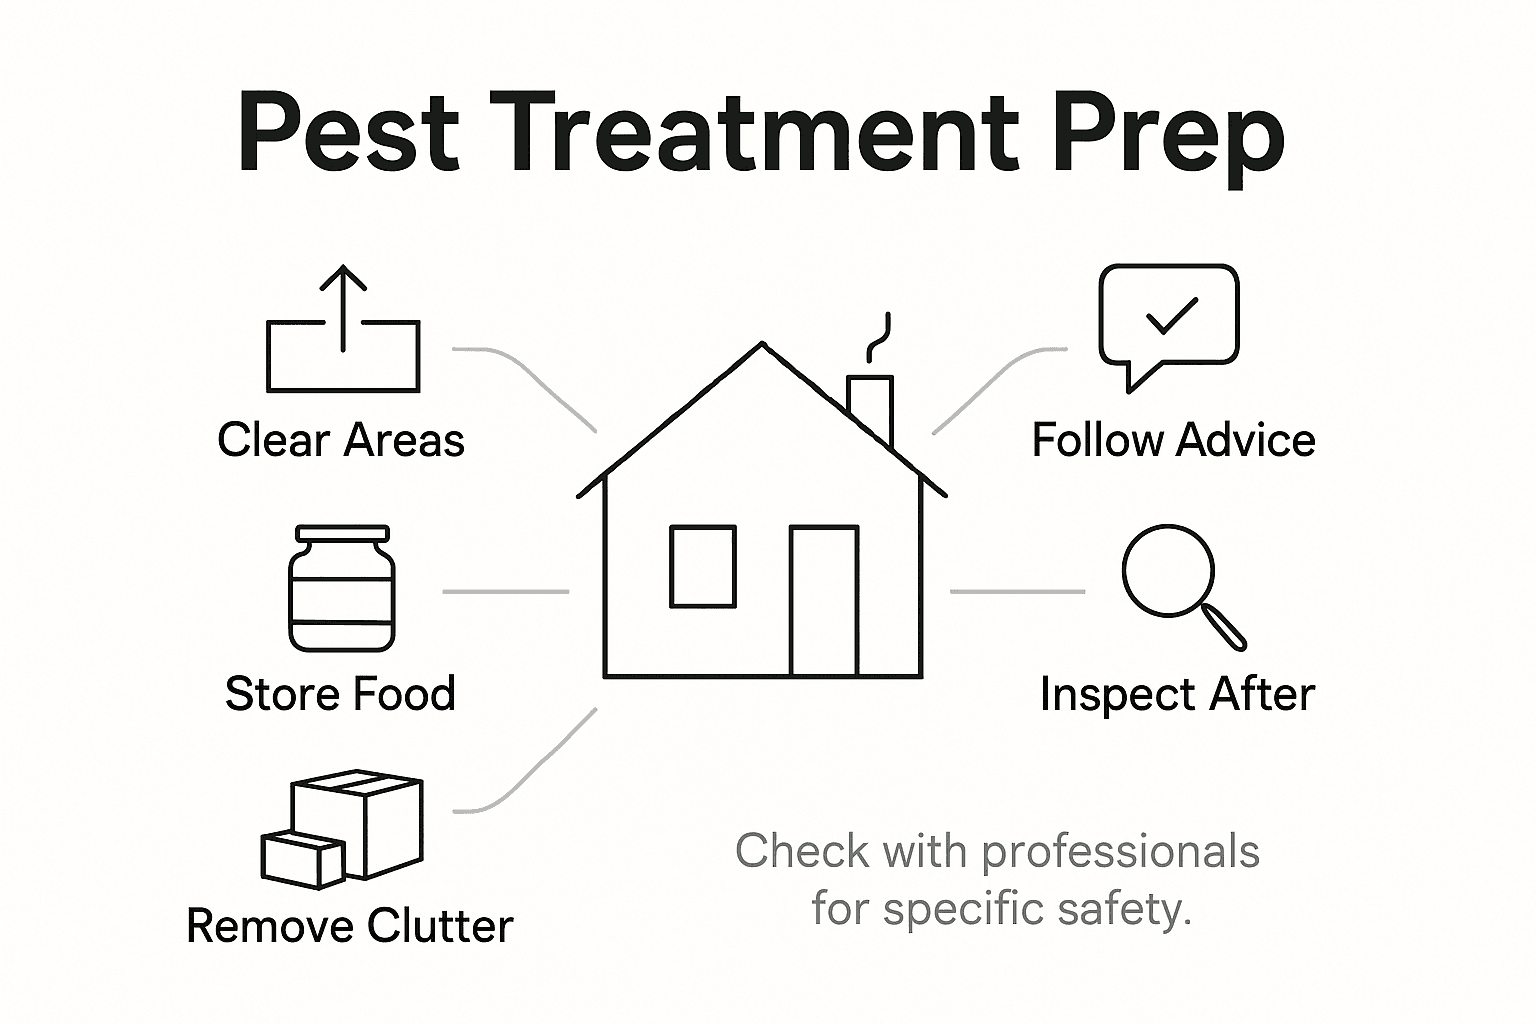
- Step 1: Clear and Protect Living Areas and Pets
- Step 2: Store Food and Personal Items Safely
- Step 3: Clean and Remove Clutter Thoroughly
- Step 4: Follow Safety Guidelines from Professionals
- Step 5: Inspect Treated Areas After Service
Quick Summary
| Main Insight | Explanation |
|---|---|
| 1. Clear Spaces for Treatments | Remove clutter and accessible items to facilitate efficient pest control and minimize risks during treatment. |
| 2. Secure Food and Belongings | Store food in airtight containers to avoid contamination and ensure the effectiveness of pest management procedures. |
| 3. Clean Thoroughly Before Treatment | Clean and declutter to eliminate pest hiding spots, helping to enhance the success of the pest extermination process. |
| 4. Follow Professional Safety Guidelines | Adhere to pesticide instructions and safety protocols to protect your family and pets during and after pest control treatments. |
| 5. Inspect Areas After Treatment | After treatment, evaluate the effectiveness and ensure safety by looking for pest signs, following up with professionals as needed. |
Step 1: Clear and Protect Living Areas and Pets
Preparing your home for pest treatment requires strategic planning to ensure the safety of your living space and pets. Proper preparation helps pest control professionals work efficiently while minimizing potential risks to your family and animals.
Start by thoroughly clearing targeted treatment areas. Remove clutter, furniture, and household items from walls and floors to provide easy access for pest control professionals. Carefully relocate children’s toys, pet bedding, food dishes, and other movable items to prevent contamination. Cover aquariums completely and turn off air pumps to protect marine life during pesticide application.
Secure your pets in a safe location away from treatment zones. Consider boarding them with a friend or keeping them in a completely separate area of the home to prevent accidental exposure to chemicals. If possible, arrange for pets to stay elsewhere during the treatment to minimize potential health risks.
Pro tip: Create a detailed checklist of items to move and secure before the pest control team arrives to streamline the preparation process and reduce day-of stress.
Step 2: Store Food and Personal Items Safely
Protecting your food and personal belongings is a critical step in preparing for pest treatment. Proper storage not only prevents potential contamination but also ensures the effectiveness of the pest control process.
Start by removing all open food items and securing them in sealed containers. Transfer pantry items, cereals, grains, and other dry goods into airtight plastic or glass containers with secure lids. Clear your kitchen countertops completely, storing cutlery, dishes, and utensils in cabinets or sealed containers. Remove garbage and ensure trash cans have tight fitting lids to prevent attracting additional pests during the treatment.
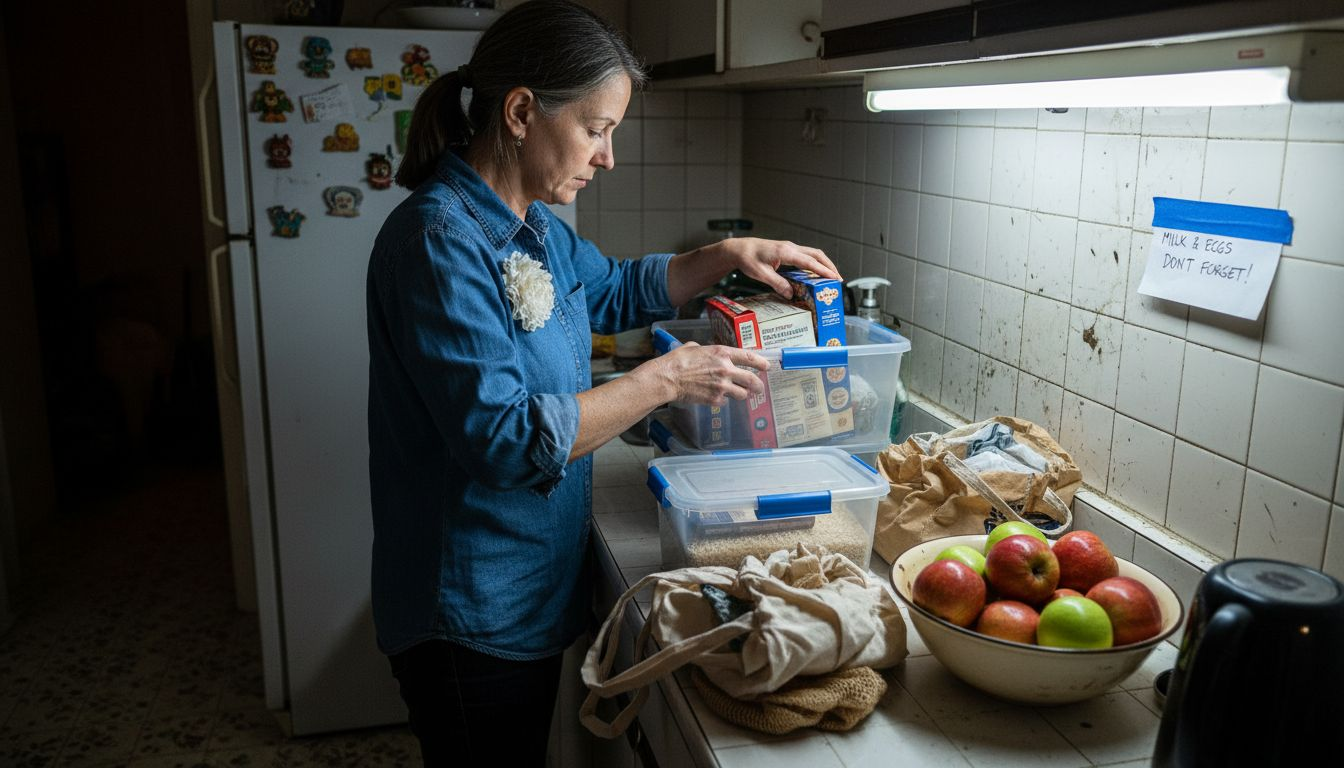
Extend your food safety strategy beyond the kitchen. Check dining areas, home offices, and living spaces for any food remnants or open containers. Pack away pet food, bird seeds, and other potential food sources that might attract pests or interfere with the treatment process. Consider using sealed storage bins or moving these items to a completely separate area of your home.
Pro tip: Create a dedicated staging area with sealable plastic bins to quickly and safely store food and personal items during pest control treatments.
Compare common storage container types for protecting food and belongings during pest control:
| Container Type | Protection Level | Reusability | Typical Use |
|---|---|---|---|
| Plastic bins with lids | Excellent barrier | Long-term | Food & pet supply storage |
| Glass containers | Airtight & durable | High | Dry goods, grains |
| Cardboard boxes | Minimal | Single use | Temporary transport only |
Step 3: Clean and Remove Clutter Thoroughly
Creating a clean and organized environment is crucial for effective pest control. A clutter-free space not only helps pest control professionals work more efficiently but also reduces potential hiding spots for unwanted pests.
Eliminate potential pest breeding grounds by thoroughly removing newspapers, magazines, and cardboard stacks. Vacuum carpets meticulously, paying special attention to corners and edges where crumbs and debris can accumulate. Sweep and mop hard floors to remove food particles and expose any hidden pest areas. Focus on often overlooked spaces like behind appliances, under furniture, and inside cabinets where pests might seek shelter.
Go beyond surface cleaning by organizing storage areas and minimizing clutter. Remove stacks of papers, cardboard boxes, and unnecessary items that can provide shelter for pests. Use clear plastic containers with tight-fitting lids for storage, which not only helps organize your space but also prevents pests from accessing potential nesting areas. Pay extra attention to areas like closets, garages, and basements where clutter tends to build up over time.
Pro tip: Invest in clear storage containers with secure lids to simultaneously organize your space and create a pest-resistant environment.
Step 4: Follow Safety Guidelines from Professionals
Ensuring your safety and the effectiveness of pest control treatment requires careful adherence to professional guidelines. Understanding and implementing the recommended safety protocols protects your family, pets, and living environment during the pest management process.
Carefully read and follow all pesticide label instructions and professional guidance. This includes wearing appropriate protective equipment if recommended, relocating children and pets until treated surfaces are completely dry, and ensuring proper ventilation in treated areas. Pay close attention to specific instructions related to the type of pest treatment being performed, as different pest control approaches may have unique safety requirements.
After the treatment, wait for explicit confirmation from the pest control professionals about when it is safe to re-enter treated areas. Follow their recommendations regarding cleaning, touching surfaces, or allowing children and pets back into specific zones. Be prepared to ventilate the space as instructed, and avoid entering restricted areas until you receive clear guidance from the professionals about safety and potential waiting periods.
Pro tip: Create a written checklist of safety instructions provided by the pest control team to ensure you follow every guideline precisely and protect your household.
Step 5: Inspect Treated Areas After Service
Comprehensive post-treatment inspection is crucial to ensure the effectiveness of pest control and verify that all safety protocols have been successfully implemented. Your careful review will help confirm the quality of the service and identify any potential follow-up needs.
Carefully observe posted warnings and restricted-entry intervals in treated areas. Wait for explicit permission from pest control professionals before entering treated zones. When you are cleared to inspect, systematically check each treated area for signs of pest activity, treatment residue, or any unexpected changes. Look for warning signs, markings, or specific instructions left by the pest control team that provide guidance about the treatment.
Document your observations and communicate any concerns or questions directly with the pest control professionals. Pay special attention to previously problematic areas, checking for new signs of pest activity or potential treatment effectiveness. If you notice any unexpected issues or incomplete pest management, contact your pest control service immediately to discuss potential follow-up treatments or additional interventions.
Pro tip: Take clear photographs of treated areas during your inspection to provide visual documentation and help professionals assess any potential follow-up needs.
Here’s a summary of how each preparation step contributes to safe and effective pest control:
| Step | Primary Goal | Risk Minimized | Professional Benefit |
|---|---|---|---|
| Clear & Protect Living Areas | Prevent pet/family exposure | Chemical contact, contamination | Enables thorough treatment |
| Store Food & Items Safely | Protect food/personal items | Food contamination | Ensures treatment effectiveness |
| Clean & Remove Clutter | Eliminate pest hiding spots | Breeding grounds, pest survival | Speeds up pest detection |
| Follow Safety Guidelines | Maintain household safety | Health risks, improper exposure | Adheres to regulations |
| Inspect Treated Areas | Assess treatment outcome | Missed issues or warnings | Supports follow-up actions |
Prepare Your Home for Pest Treatment with Expert Help
Facing the challenge of safely preparing your home for pest treatment can feel overwhelming. From clearing living areas and protecting pets to safely storing food and following strict safety guidelines every step matters to ensure a pest-free and safe environment. If you want to avoid risk of contamination and make sure the treatment is truly effective you need a professional partner who understands the importance of these detailed preparations.
At Apex Pest Control we prioritize the safety of your family pets and home while delivering comprehensive pest management solutions tailored to your specific needs. Whether you require one-time treatment or ongoing programs for pests like ants rodents or stinging insects we ensure every phase from early preparation to post-treatment inspection is handled with care and expertise. Discover more about our commitment by visiting our Uncategorized Archives – Apex Pest Control. Don’t leave your home’s safety to chance take control now by requesting a personalized plan at Apex Pest Control Free Quote.
Act today to secure your home and family against pests with a trusted professional team that values safety and effective results.
Frequently Asked Questions
How should I prepare my home before pest treatment?
To prepare your home for pest treatment, start by clearing the targeted treatment areas of clutter, furniture, and movable items. Ensuring easy access for pest control professionals allows for a thorough and effective treatment process.
What safety measures should I take for my pets during pest control?
Secure your pets in a safe area away from treatment zones to prevent accidental exposure to chemicals. Consider boarding them elsewhere if possible, ensuring their safety throughout the pest treatment period.
How can I protect my food and personal belongings?
Remove all open food items and store them in sealed containers. This prevents contamination and enhances the effectiveness of the pest control process by eliminating potential food sources for pests.
Why is cleaning important before pest treatment?
Cleaning your home helps eliminate potential hiding spots for pests and facilitates easier access for pest control professionals. Focus on vacuuming carpets and clearing clutter, especially in areas that are often overlooked.
What guidelines should I follow after pest treatment?
After treatment, closely follow the pest control professional’s safety guidelines regarding re-entering treated areas. Wait for confirmation that it is safe to return, and ensure proper ventilation before entering the space again.
How can I assess the effectiveness of the pest treatment?
To assess the effectiveness of the treatment, inspect the treated areas for signs of pest activity and any treatment residue. Document your observations to communicate with your pest control provider for potential follow-up needs.